
This page covers the device-specific wiring for a beam sensor (sender + receiver pair). For general device setup and activity settings, see Add device.
The beam sensor detects when something crosses a beam between a paired sender and receiver. Useful for monitoring intrusion across a defined line — companionways, gangways, dock access, or any space that should remain clear.
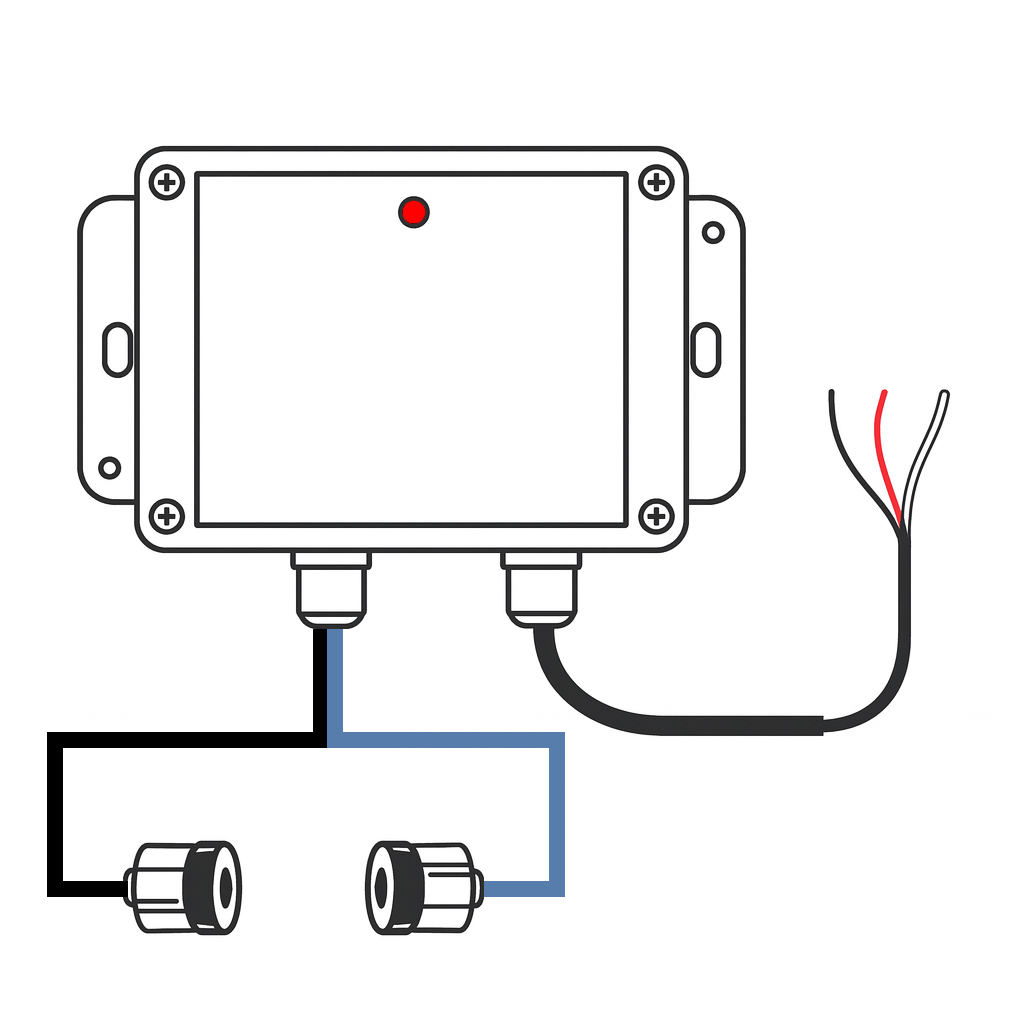
Uses a digital input slot (4–7) on the BRNKL connector.
The BRNKL 5G wiring is different from BRNKL Blue. The BRNKL 5G uses dry contact inputs — the white wire is pulled to ground when the beam breaks. The BRNKL Blue uses wet contact inputs — the white wire goes high. Using the Blue wiring method on the BRNKL 5G will apply DC voltage to a digital input and can damage the unit.
Prerequisites
-
Beam sensor sender + receiver pair
-
12–24 V DC unswitched power supply
-
Marine-grade wiring if extending the supplied leads
-
An available BRNKL digital input (slot 4, 5, 6, or 7)
Wiring
-
Red wire → common ground
-
Black wire → 12–24 V DC supply (unswitched)
-
White wire → BRNKL connector digital input slot 4, 5, 6, or 7
When the beam breaks, the internal relay closes and pulls the white wire to ground, triggering the input.
Note which slot you use — you will need it when configuring.
If you need to extend the wiring, splice in marine-grade 18 AWG (or larger) wire. Ensure all splices are sealed and rated for the marine environment.
Mount sender and receiver
-
Align the sender and receiver so they face each other directly with a clear line of sight.
-
Maximum separation: 30 ft (≈ 9 m).
-
Secure each unit to prevent misalignment from vibration or movement.
-
During installation, monitor the LED on the sensor enclosure:
-
LED not blinking — beam is intact and aligned.
-
LED blinking — beam is broken (trigger condition).
-
Configure
In the BRNKL app, go to Settings > Devices and select the input matching your slot:
|
Slot |
App setting |
|---|---|
|
4 |
Digital 1 |
|
5 |
Digital 2 |
|
6 |
Digital 3 |
|
7 |
Digital 4 |
This is a Digital input. Recommended settings:
-
Monitor — on
-
Alert — on
-
Name — e.g., Beam sensor or Gangway
-
High Name — Clear
-
Low Name — Triggered
-
Alert On — Low (alerts when beam is broken)
Tap Save.
Test
-
Wait 15 minutes for settings to sync.
-
With the beam unobstructed, confirm the LED is not blinking and the input shows Clear.
-
Pass an object or person through the beam path. The LED should blink and the BRNKL input channel should switch to Triggered.
-
If LED behaviour is inconsistent, fine-tune the alignment between sender and receiver.
Troubleshooting
-
LED stays blinking constantly — check alignment and ensure no obstructions or reflective surfaces are interfering with the beam path.
-
LED never blinks when obstructed — verify wiring (power, ground, and the white wire to the correct slot) and confirm the correct Digital input is enabled in the app.