Install BRNKL
Position and mount your BRNKL 5G, then connect the antenna.
Video walkthrough
Meet BRNKL
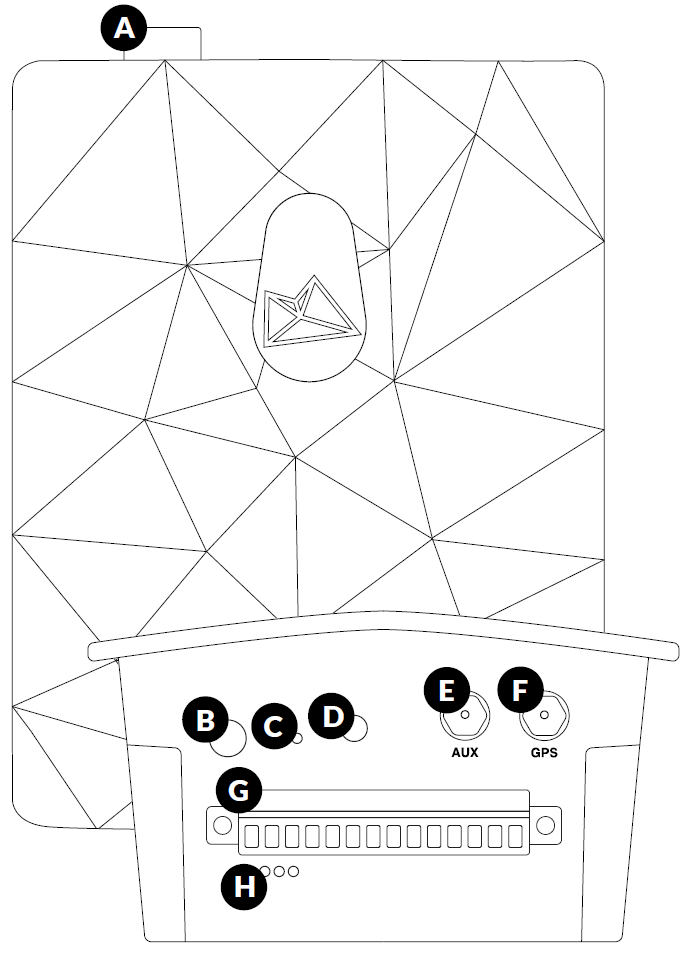
Familiarise yourself with the ports and controls before installing.
Component | |
|---|---|
A | Device port — camera, satellite device, or BRNKL Mate |
B | Connection test button |
C | Reset button |
D | Indicator light |
E | Mobile antenna port (AUX) |
F | GPS antenna port (GPS) |
G | Connector — wired devices and power |
H | Environmental sensors — temperature, humidity, pressure, tilt |
What you need
In the box
BRNKL 5G
2.5 mm flathead screwdriver
Antenna
Mounting bracket with 8 screws
Tools and supplies
Phillips #1 screwdriver
Pencil
Cable ties and cable tie mounts
Install BRNKL
Select a position
Choose a mounting location that meets all of these requirements:
Indoors, in a dry location
Close to a constant, unswitched house battery terminal
Within 3 m (10 ft) of your planned antenna location
On a stable, preferably vertical surface
At least 5 cm (2") clearance at the top and bottom for port access
Do not mount with the bottom connector facing up. The connector must face down or sideways.
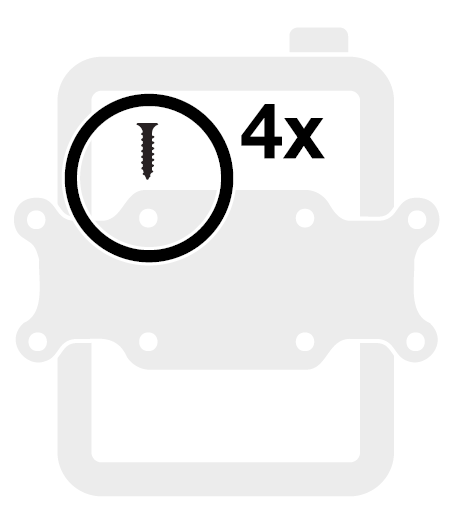
Attach the mounting bracket
Place the BRNKL face-down on a flat surface.
Align the mounting bracket with the four holes on the rear of the unit.
Secure using four of the supplied screws.
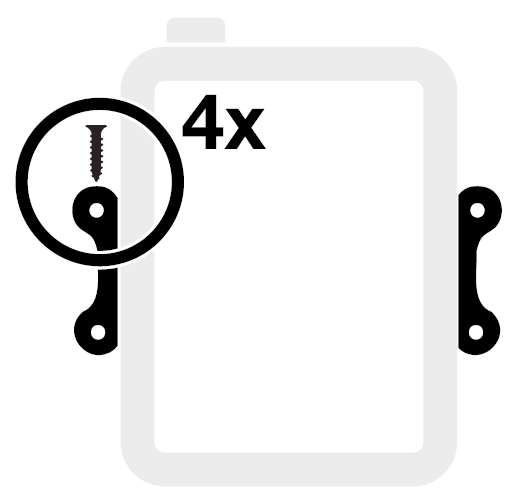
Mount the assembly
Hold the assembly against your chosen surface, aligned squarely.
Mark the four outer screw holes with a pencil. Drill pilot holes if needed.
Secure with the remaining four supplied screws.
Add antenna
Select antenna position
Within 3 m (10 ft) of the BRNKL
Metal hull: position outdoors, or indoors next to a window
Fibreglass hull: position outdoors, or indoors next to an outside wall or window
The top of the antenna must be facing upwards and have clear view of the sky.
Install the antenna
Clean and dry the mounting surface.
Completely remove the adhesive backing from the antenna base.
Press the antenna firmly into position for a few seconds.
Route the cable to the BRNKL and secure with cable ties.
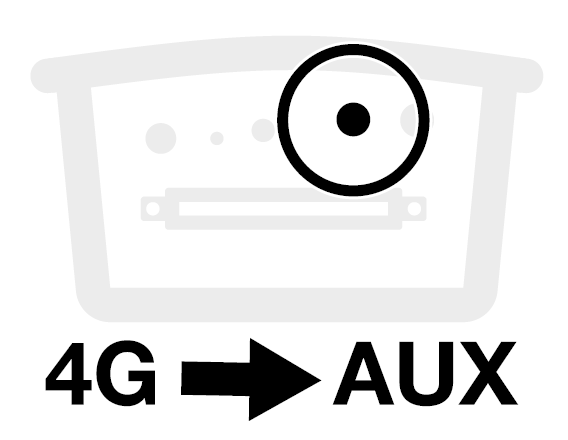
Connect the antenna cables
On the bottom of the BRNKL:
Plug the 4G cable into the AUX port. Turn the collar to fasten.
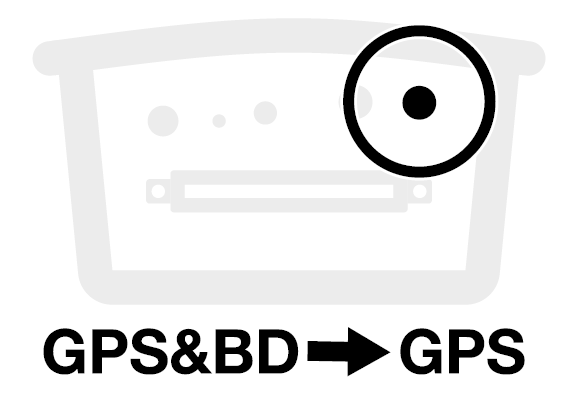
Plug the GPS&BD cable into the GPS port. Turn the collar to fasten.