
Keep your BRNKL 5G connected when it's outside mobile network coverage by adding a satellite connection. This requires a compatible satellite device and a BRNKL satellite service plan.
The compatible satellite device is the RockBLOCK+ by Rock Seven, sold as the BRNKL Satellite Kit. The kit includes the RockBLOCK+ with BRNKL-compatible cable and a mounting plate.
Video walkthrough
Overview
Setting up a satellite connection has two parts:
-
Add a satellite device — physically install the RockBLOCK+ and connect it to your BRNKL
-
Add satellite service — purchase a BRNKL satellite plan and verify the connection
Before you start
Disconnect all AC power sources before accessing electrical panels, switches, or devices.
If you're unfamiliar with basic electrical systems, hire a professional installer or a marine electrician.
What you need
In the box (BRNKL Satellite Kit)
-
RockBLOCK+ satellite device with BRNKL-compatible cable
-
Mounting plate
Optional
-
ROKK Rail Mount for RockBLOCK+ (sold separately, for railing installation)
Devices
-
BRNKL 5G, setup complete
-
iOS or Android mobile device with internet connection and BRNKL app installed
Services
-
BRNKL user account and password
-
Active BRNKL subscription
-
Credit card (for satellite plan)
Tools
-
Wire stripper and crimper tool
-
Heat gun or lighter
You may also need
-
Multi-head screwdriver
-
Wrench set
-
Power drill and bit set
-
Non-conductive fish tape
-
Flashlight or headlamp
Supplies
-
Marine grade wire, 18 AWG (red)
-
Marine grade wire, 18 AWG (black or yellow)
-
2× heat-shrink ring terminals, 22–18 AWG (one sized to battery bus terminal, one to common ground)
-
In-line fuse holder, 18 AWG, ATC/ATO
-
1× 2 A fuse, ATC/ATO
-
3× heat-shrink butt connectors, 22–18 AWG
-
Cable ties and cable tie mounts
You may also need
-
Marine grade 4-conductor cable, 22–18 AWG (for longer cable runs)
-
4× #12 316 stainless steel screws matched to mounting surface (for surface mount)
-
4× additional heat-shrink butt connectors, 22–18 AWG
-
Electrical tape
Part 1 — Add a satellite device
Step 1 — Position the satellite device
Select a permanent mounting position for the RockBLOCK+ before running any cables.
Do not install it yet.
-
Place outdoors, facing the sky, with a 360° clear view of the horizon
-
Provide a stable mounting surface — options are:
-
Surface mount: flat horizontal surface, using the supplied mounting plate
-
Rail mount: horizontal railing, 20–34 mm (0.8–1.3") diameter, using the ROKK Rail Mount kit
-
-
Allow for a discreet cable run to the BRNKL 5G or BRNKL Mate
-
Maintain at least 1 m (3 ft) distance from any GPS antenna
Step 2 — Prepare satellite device wiring
Run the serial cable
Do not plug the serial cable in at this stage.
-
From the RockBLOCK+, run the cable to either the BRNKL 5G device port, or the BRNKL Mate red port (R) if a Mate is connected
-
To make longer cable runs, see the cable lengthening instructions at the end of this page
-
Hide the cable in conduit, wall cavities, or wiring channels
Run power wiring
Do not connect wiring to the battery at this stage.
-
From the power leads on the serial cable, run a red wire to a battery bus (constant 9–30 V DC) and a black wire to a common ground terminal
-
To route through small openings, remove the serial cable plug (see end of page)
-
Leave 20 cm (8") of slack at each end and secure with cable ties
Prepare power wiring splices
-
Trim excess wire. Strip 10 mm (½") from the ends of the red and black wires, and the red and black power leads.
-
Crimp the red wire and red power lead together with a heat-shrink butt connector. Heat-seal.
-
Crimp the black wire and black power lead together with a heat-shrink butt connector. Heat-seal.
Prepare battery bus wiring
-
Trim excess red wire at the battery end. Strip 10 mm from the end and one fuse holder lead. Crimp together and heat-seal.
-
On the remaining fuse holder lead, strip 10 mm and crimp on a ring terminal sized to the battery bus terminal. Heat-seal.
Prepare ground wiring
-
Trim excess black wire at the ground end. Strip 10 mm. Crimp on a ring terminal sized to the common ground terminal. Heat-seal.
Step 3 — Connect the satellite device
Connect to battery bus
Do not insert a fuse at this stage.
-
Attach the fuse holder ring terminal to a positive terminal on the battery bus. Secure with cable ties.
Connect to common ground
-
Attach the black wire ring terminal to the common ground terminal. Secure with cable ties.
Insert fuse
-
Insert a 2 A fuse into the fuse holder.
Connect serial cable to BRNKL device
Connect directly to BRNKL 5G: Unplug any camera from the device port, then plug the serial cable in and turn the collar to fasten.
Connect to BRNKL Mate: Plug the serial cable into the Mate's red port (R) and turn the collar to fasten.
Step 4 — Link the satellite device
-
In the BRNKL app, go to Settings > Add device > RockBLOCK+.
-
Scan the QR code on the underside of the device, or enter the printed serial number.
-
Follow the on-screen instructions.
-
Go to Settings > BRNKL > Satellite settings to confirm the device appears.
Step 5 — Test the satellite device connection
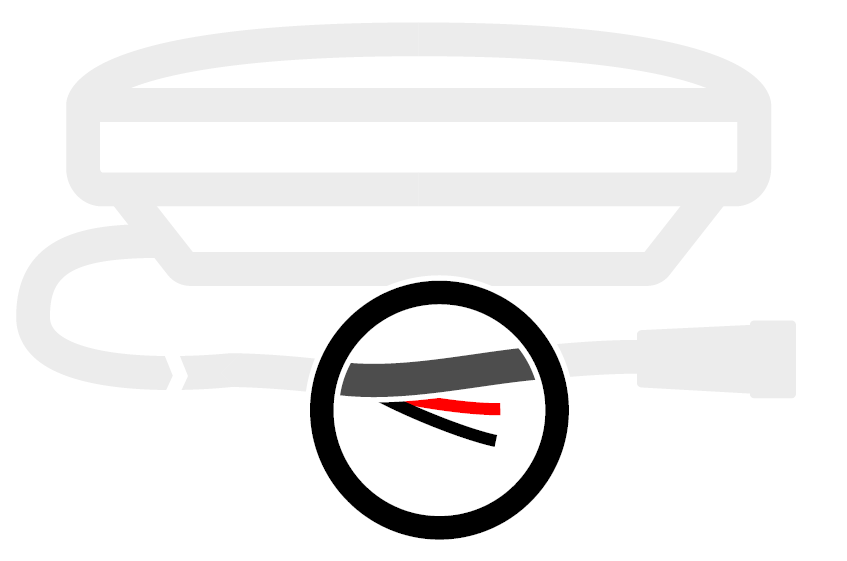
Connected directly to BRNKL 5G: Press and release the Connection test button on the bottom of the BRNKL. A solid blue indicator light means the satellite device is connected. Flashing means not connected — check cables and retry.
Connected to BRNKL Mate: In the app, go to Settings > BRNKL > Satellite settings > Test cable connection > Test.
Step 6 — Install the satellite device
Surface mount (plate included)
-
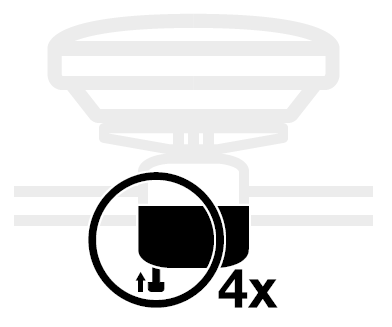
Attach the mounting plate to the base using the supplied 8 mm hex screws and plastic washers.
-
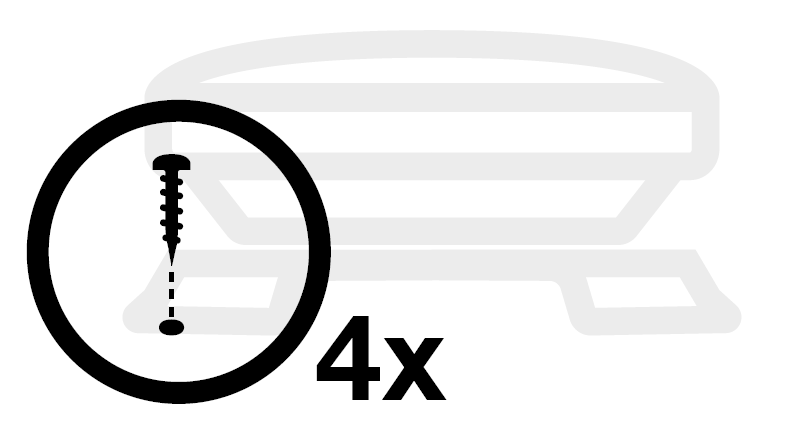
Mark and drill screw holes in your selected position. Secure with four #12, 316 stainless steel screws (not supplied).
-
Secure the cable at the nearest fixed point, allowing a 5 cm (2") bend radius.
Rail mount (ROKK kit, not included)
-
Attach the mount to the base using the supplied 12 mm hex screws and washers, oriented for your railing direction.
-
Remove the 35 mm hex screws and bottom bracket. Clamp onto the rail and reattach the bracket loosely.
-
Align the device with the horizon before tightening. Secure the cable with cable ties, allowing a 5 cm (2") bend radius.
Part 2 — Add satellite service
Step 1 — Add a satellite plan
-
In the BRNKL app, go to Settings > BRNKL > Satellite settings > Plan > +.
-
Select a plan and complete payment.
Step 2 — Test satellite service
-
In the BRNKL app, go to Settings > BRNKL > Satellite settings > Test signal > Test.
-
Wait 5 minutes, then check Last signal. If the time has updated, the BRNKL connected to the Iridium network successfully.