
Add an output device to your BRNKL Blue. The BRNKL Blue has two relay outputs that switch to ground, used to control external devices such as sirens, strobes, floodlights, or indicator lights.
-
Type — relay outputs (switch to ground).
-
Capacity — up to 2 A maximum load per output.
-
Polarity — outputs switch to ground, so the device being controlled must have its positive supply wired separately.
Do not exceed the 2 A limit. For higher-draw devices, use the BRNKL output to drive an external automotive relay instead — see "High-power wiring" below.
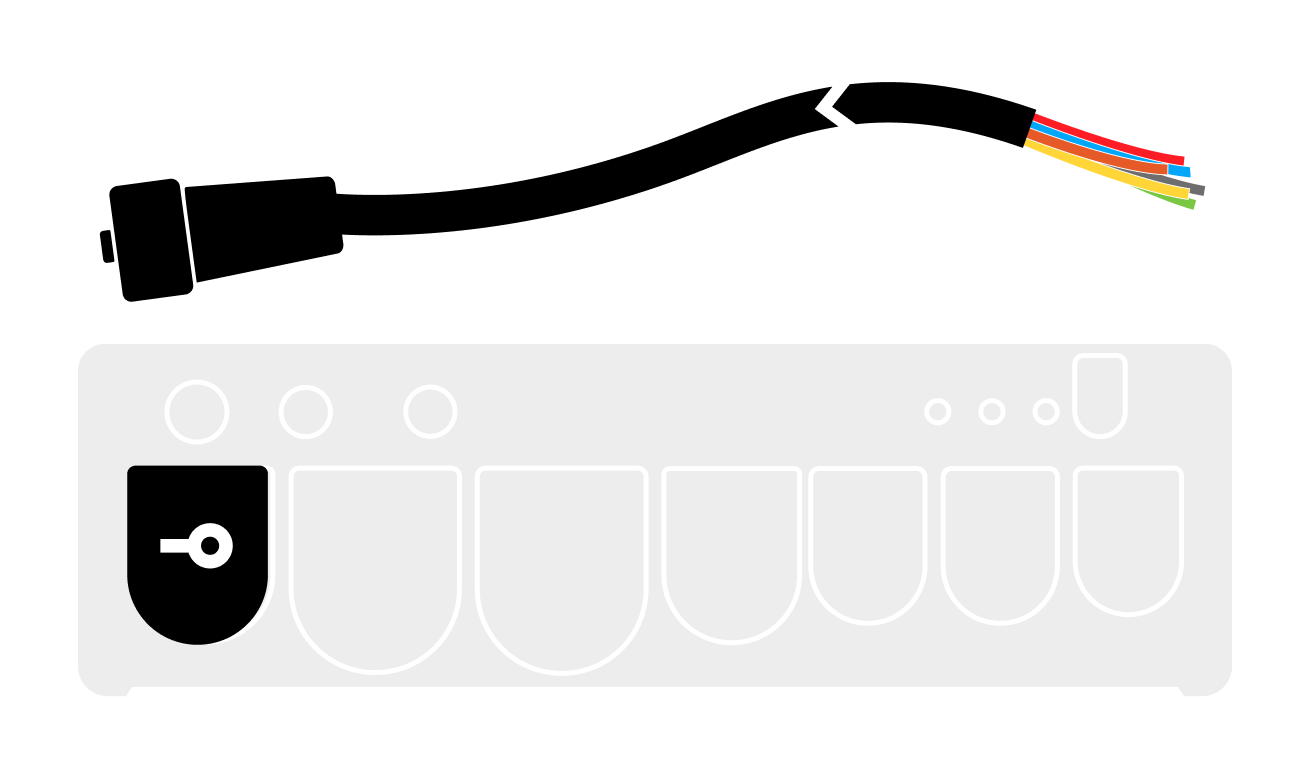
See the BRNKL Blue connection guide for connector cable details.
Video walkthrough
Wiring
Standard wiring (< 1 A loads)
For devices drawing less than 1 A — sirens, some LED strobes, small buzzers, indicator lights — wire directly to the BRNKL output:
-
Positive terminal

-
Negative terminal


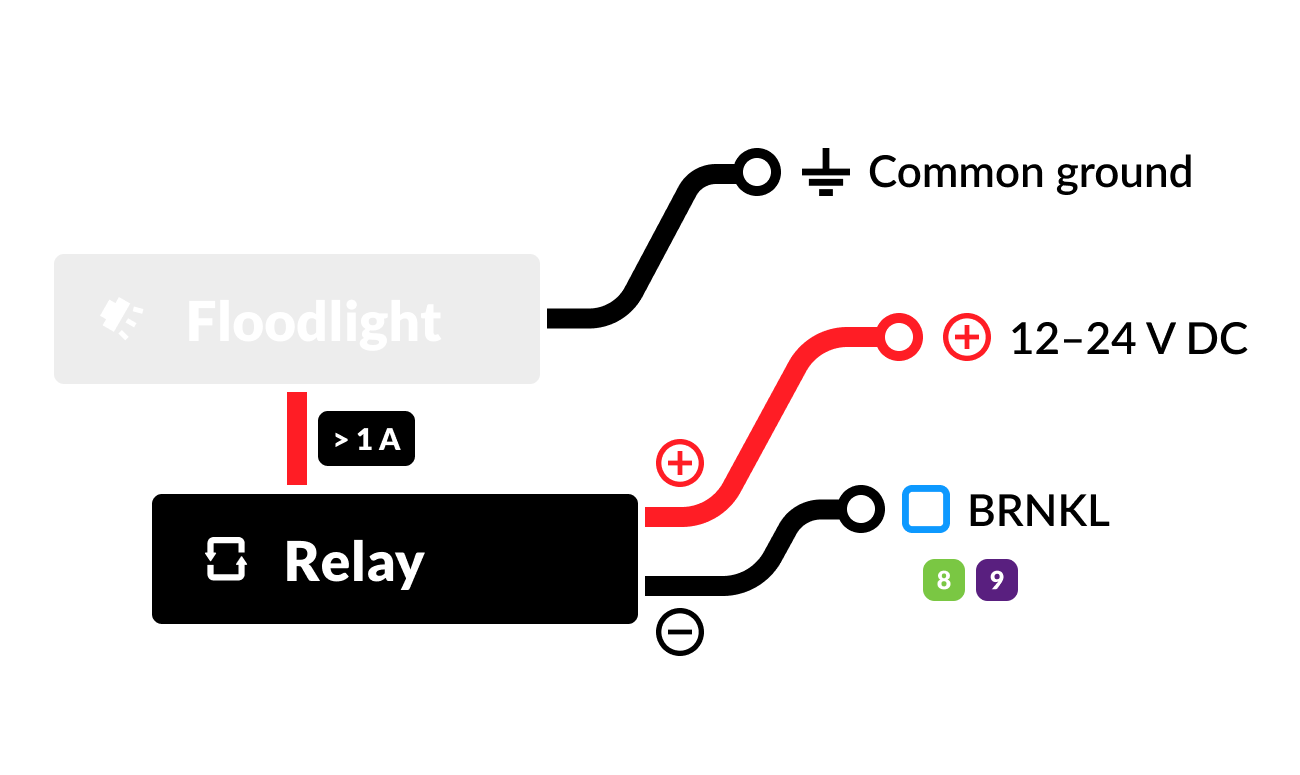
High-power wiring (> 1 A loads)
For devices drawing more than 1 A — larger sirens, floodlights, larger buzzers — use the BRNKL output to drive a 12–24 V DC automotive relay. The relay handles the actual load.
-
Device positive terminal
-
Device negative terminal
-
Relay terminal 30 (COM)
-
Relay terminal 85 (COIL-)
-
Relay terminal 86 (COIL+)
Configure
In BRNKL Device Manager, go to Settings > Outputs, then expand the output you wired the device to.
Settings
-
Remote Control — when enabled, the output can be manually triggered from the BRNKL app.
-
Output Name — descriptive name shown on the dashboard and in alerts.
-
Type — selects a preset: Generic, Arm/Disarm Indicator Light, Strobe, or Siren.
-
High Name — label displayed when the output is active.
-
Low Name — label displayed when the output is inactive.
-
Duration — how long the output stays active when toggled: Forever, 1 Minute, 5 Minutes, or 15 Minutes.
Examples
Siren
Wire directly (standard pattern). In settings: Type: Siren, Duration: 5 Minutes, Remote Control: enabled.
Strobe light
Wire directly (standard pattern). In settings: Type: Strobe, Duration: 15 Minutes.
Floodlight
Wire through an automotive relay. In settings: Type: Generic, Duration: Forever or 15 Minutes, Remote Control: enabled.
Arm/disarm indicator light
Wire directly. In settings: Type: Arm/Disarm Indicator Light, Duration: Forever, Remote Control: disabled.