
Overview
BRNKL supports video feeds from most FLIR IP cameras, but the following models are officially supported:
-
FLIR M3xx (M300 series)
-
FLIR M4xx (M400 series)
-
FLIR M5xx (M500 series)
-
FLIR AX8
Install camera
-
Mount the camera according to the manufacturer’s instructions.
-
Connect the camera to the vessel’s IP network.
-
Ensure the camera is powered on during configuration.
Find camera IP address
-
Open BRNKL Device Manager → Settings > Cameras.
-
Click + Add Camera.
-
From Available Cameras, find the FLIR camera and make note of its IP address.
FLIR M3xx
Features Supported
-
Pan-tilt-zoom (PTZ) control
-
Preset control (sending the camera to a configured preset)
Prepare M3xx Camera
-
Access the camera’s webpage in a browser using the IP address.
-
Create a username and password and record them for later use.
-
Configure the thermal stream:
-
Navigate to Video → Select T1 (Thermal 1)
-
Frame Rate: 20
-
Bit Rate: 3000 kbps
-
Enable Multicast: No
-
Click Save
-
-
Configure the visible stream:
-
Navigate to Video → Select V1 (Visible 1)
-
Frame Rate: 20
-
Bit Rate: 3000 kbps
-
Enable Multicast: No
-
Click Save
-
-
Configure a static IP address:
-
Navigate to the network settings page.
-
Set the IP address to the same one currently assigned via DHCP or to an IP address of your choosing.
-
Set Gateway address to the IP of the MFD or Router that BRNKL is connected to. By default, set the Gateway to the same one currently assigned by DHCP.
-
Save and apply the settings.
-
Add Camera to BRNKL Device Manager
1. Add Thermal Stream
-
Open BRNKL Device Manager → Settings > Cameras > + Add Camera
-
From Available cameras, select the FLIR M3xx camera
-
Enter:
-
Username:
<username> -
Password:
<password> -
Name: descriptive location/view (e.g., FLIR Thermal)
-
-
Click Add
2. Add Visible Stream
-
In BRNKL Device Manager, open the camera you just added.
-
Scroll down to find the RTSP URL (e.g.,
rtsp://<ip address>:8554/ir.0). -
Copy the URL.
-
Go to Settings > Cameras → + Add Camera.
-
Below Available Cameras, select + RTSP URL.
-
Paste the RTSP URL and replace
ir.0withvis.0.-
Example:
rtsp://<ip address>:8554/vis.0
-
-
Enter a descriptive name (e.g., FLIR Visible).
-
Click Add.
FLIR M4xx / M5xx
FLIR M4xx/5xx cameras contain a known FLIR firmware issue that prevents them from streaming continuously to MFDs or devices like BRNKL for more than 24 hours without crashing.
To avoid this issue, it is strongly recommended that the camera be powered off at the end of every trip.
Features Supported
-
Pan-tilt-zoom control
-
Home position preset
-
Parked position preset
-
❌ Presets beyond Home and Parked are not supported.
Prepare Camera
-
Access the camera’s webpage in a browser using the IP address.
-
Login with the default username and password:
-
Username: admin
-
Password: admin
-
-
Configure the visible stream:
-
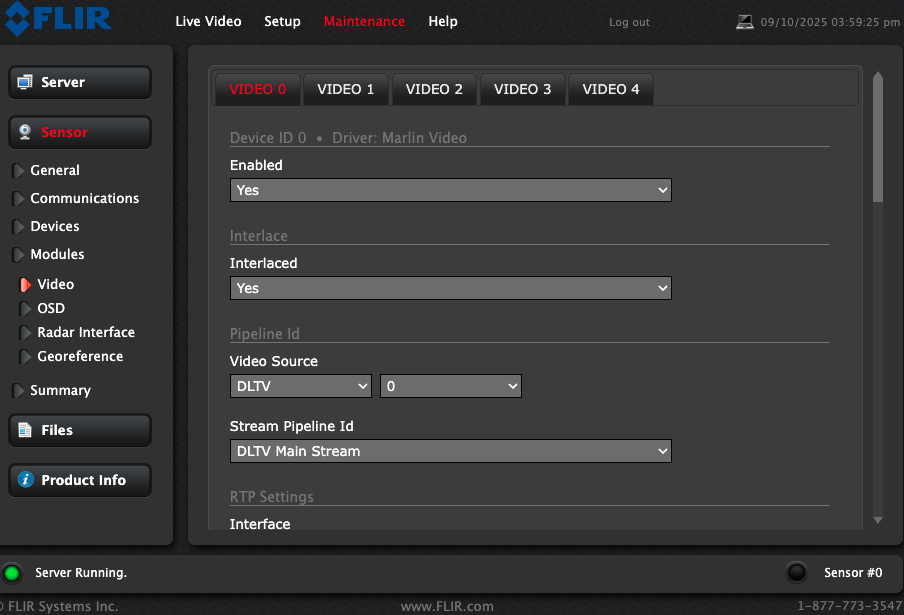
Navigate to Maintenance → Sensor → Modules → Video
-
Select the Video option from the top menu “Video 0” and set the following:
-
Frame Rate: 15
-
Bit Rate: 250000
-
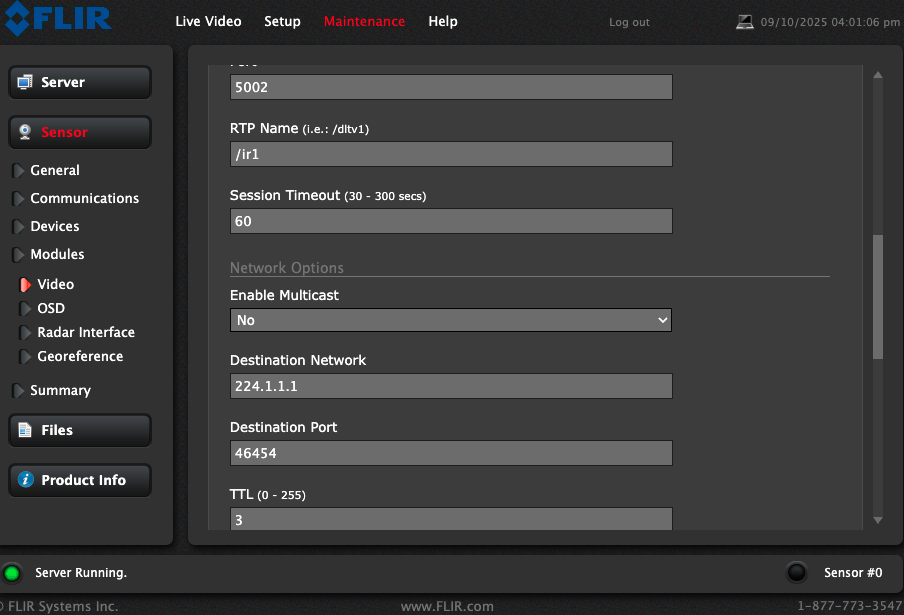
Enable Multicast: No
-
Click Save
-
-
Configure the IR stream:
-
Navigate to Maintenance → Sensor → Modules → Video
-
Select the Video option from the top menu “Video 2” and set the following:
-
Frame Rate: 15
-
Bit Rate: 250000
-
Enable Multicast: No
-
Click Save
-
-
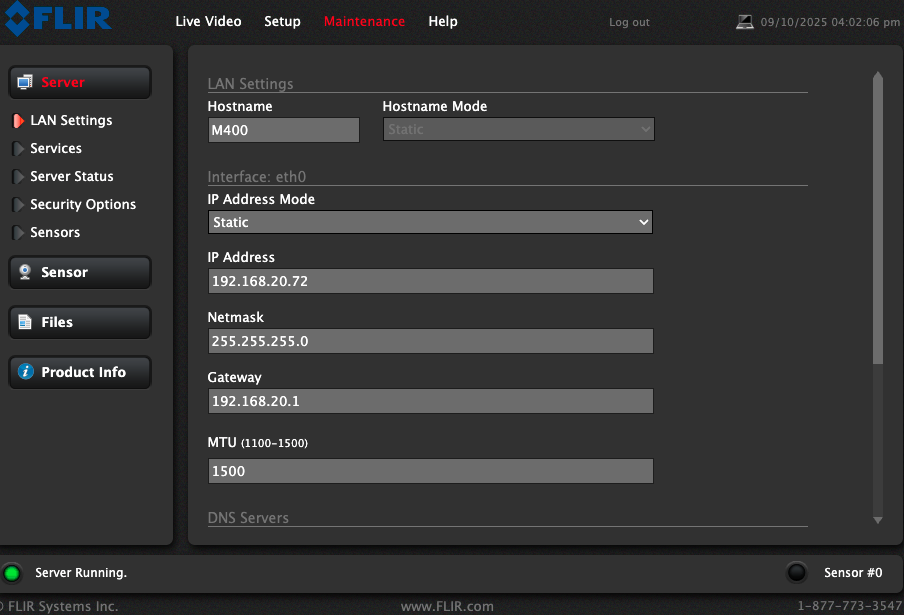
Configure a static IP address:
-
Navigate to the network settings page.
-
Set the IP address to the same one currently assigned via DHCP or to an IP address of your choosing.
-
Set Gateway address to the IP of the MFD or Router that BRNKL is connected to. By default, set the Gateway to the same one currently assigned by DHCP.
-
Save and apply the settings.
-
-
Enable the Nexus interface (required for BRNKL auto-discovery and control):
-
Go to Maintenance > Sensor > Communications > Networking → set Enabled to Yes.
-
Then go to Maintenance > Sensor > Communications > VMS Remote → ensure Enabled is set to Yes.
-
Save and apply the settings.
-
Add Camera to BRNKL Device Manager
1. Add Thermal Stream
-
Open BRNKL Device Manager → Settings > Cameras > + Add Camera.
-
The IR feed should appear automatically in the list of discovered cameras.
-
If it does not:
-
Click + IP Address
-
Enter the camera’s IP address manually.
-
-
Enter the default login credentials:
-
Username: admin
-
Password: admin
-
-
Assign a descriptive name (e.g., FLIR Thermal).
-
Click Add.
2. Add Visible Stream
-
In BRNKL Device Manager, open the FLIR camera entry you just added.
-
Add a new camera using the RTSP URL method:
-
Go to Settings > Cameras > + Add Camera → + RTSP URL.
-
Use the visible stream RTSP URL:
rtsp://<IP address>:5000/dltv1(or use the secondary daylight stream if preferred:
rtsp://<IP address>:5001/dltv2)
-
-
Enter the camera’s login credentials.
-
Name the camera descriptively (e.g., FLIR Visible).
-
Click Add.
Additional RTSP Stream Options
-
Daylight primary stream:
rtsp://<IP address>:5000/dltv1 -
Daylight secondary stream:
rtsp://<IP address>:5001/dltv2 -
Thermal primary stream:
rtsp://<IP address>:5002/ir1 -
Thermal secondary stream:
rtsp://<IP address>:5003/ir2
FLIR AX8
Prepare AX8 Camera
-
Access the camera’s web interface via its IP address.
-
Set up username and password (refer to AX8 manual).
-
Confirm RTSP streaming is enabled.
Add AX8 Camera to BRNKL Device Manager
-
The AX8 connects only using the RTSP camera add process.
-
Open BRNKL Device Manager → Settings > Cameras > + Add Camera.
-
Select + RTSP URL.
-
Enter the RTSP address
-
Default RTSP address:
rtsp://<ip address>/avc
-
-
Enter a descriptive name (e.g., FLIR AX8 Engine Room).
-
Click Add.